

Yo, folks! As a supplier of Toy Car Molds, I'm stoked to spill the beans on the nitty - gritty of the manufacturing process of these amazing toy car molds. It's a journey from concept to a tangible, high - quality product that's gonna blow your mind!
1. Designing the Toy Car Mold
First things first, the whole process kicks off with the design phase. We start by getting inputs from our clients. They come with all sorts of cool ideas, like the shape of the toy car, its color scheme, and any special features it should have. Based on these ideas, our designers fire up their CAD (Computer - Aided Design) software. It's like a magic tool that lets them bring the initial sketch to life in a 3D digital environment.
Using CAD, we can play around with different dimensions, add details like wheels, spoilers, and even the coolest light - up features. We make sure that every little part of the toy car can be properly formed in the mold. This is where we ensure that the look and feel of the toy car match the client's vision. And if they have any industry - specific requirements, like safety standards for children's toys, we factor that in too. Once the design is finalized, it's like we've got the blueprint for an awesome project.
2. Selecting the Right Materials
Now, choosing the materials for the toy car mold is super important. We usually go for high - quality steel or aluminum. Steel is great because it's super strong and durable. It can withstand the high pressure and temperature that come with the molding process. Plus, it gives a really smooth finish to the toy car, making it look extra cool. Aluminum, on the other hand, is lighter and more cost - effective. It's a great option if the production volume isn't too high or if we need to make the mold in a hurry.
We also make sure that the materials we pick are compliant with all the safety regulations. Since these are for toy cars, especially the ones Children Electrical Car Mould which kids are gonna use, we can't take any chances with sub - standard materials. Safety always comes first!
3. CNC Machining
Once the material is selected, it's time for the CNC (Computer Numerical Control) machining. This is like the high - tech cutting part of the process. The CNC machine uses the CAD design as a guide to precisely cut and shape the material into the mold. It's a super accurate process, down to the tiniest millimeter.
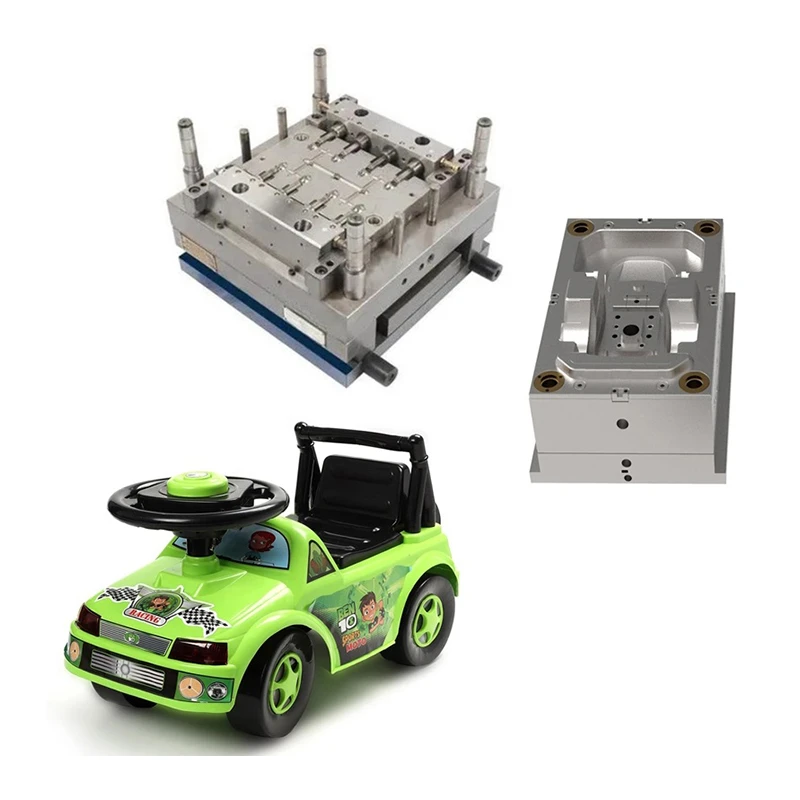

The CNC machine has different tools that do different jobs. There are cutters that remove large chunks of material, and there are also finer tools that add the detailed features like the car's logo or the curves of its body. It's all automated, which means we can get a consistent and high - quality result every time. As the machine works its magic, it's really amazing to see the raw material slowly transform into the basic shape of the toy car mold.
4. Heat Treatment
After the CNC machining, the mold goes through heat treatment. This step is crucial because it changes the physical properties of the mold. We heat the mold to a really high temperature and then cool it down in a controlled way. This makes the mold stronger and more resistant to wear and tear.
When the mold is being used in production, it goes through a lot of stress. The heat treatment ensures that it can handle that stress without getting damaged easily. It's like giving the mold a super - power to stay in good condition for a long time, so we can produce a whole lot of toy cars from it.
5. Surface Finishing
The surface finish of the mold is what gives the final toy car its smooth and shiny look. We use different methods to achieve the perfect surface finish. One common way is polishing. We use special polishing tools to make the mold's surface as smooth as possible. This not only makes the toy car look great but also helps in the demolding process.
Sometimes, we also use coating on the mold's surface. The coating can protect the mold from corrosion and make it easier for the plastic or other molding materials to flow out of the mold. It's like adding a layer of protection and convenience. And for those Plastic Toy Mould, a good surface finish is a must to get that perfect plastic toy car.
6. Testing the Mold
Before we send the mold off to our clients, we test it thoroughly. We use a test injection molding machine to see how the mold performs. We insert the appropriate molding material, which is usually plastic for toy cars, and see if it fills the mold properly.
We check for any defects like air bubbles, uneven surfaces, or misaligned parts on the test - produced toy car. If there are any issues, we go back and make the necessary adjustments. This could mean making some minor changes to the mold's surface or adjusting the way the material is injected. It's all about making sure that when our clients use the mold, they'll get high - quality toy cars every single time.
7. Assembly and Delivery
Once the mold passes all the tests, it's time for assembly. If the mold has multiple parts, we carefully put them together. We make sure that everything fits perfectly, and all the moving parts work smoothly.
After assembly, we pack the mold really well to protect it during transportation. And then, it's ready to be delivered to our clients. Whether they're making Toy Car Mold for kids' play or for a collector's item, we're confident that our high - quality mold will help them achieve their goals.
So, there you have it, the whole manufacturing process of toy car molds. It's a combination of high - tech machinery, skilled craftsmanship, and a whole lot of attention to detail. If you're in the market for top - notch toy car molds, don't hesitate to reach out. Let's have a chat and figure out how we can bring your amazing toy car ideas to life!
References
- Industry standards and best practices in toy mold manufacturing
- Manufacturer's guides for CNC machines and heat treatment equipment