

As a front grille mould supplier, I've encountered various issues with these essential tools over the years. Front grille moulds are crucial in the automotive industry, used to create the distinctive front grilles that not only enhance a vehicle's aesthetics but also play a role in its functionality. However, like any other tool, they can experience wear and tear, and knowing how to repair them is vital to ensure continuous production and cost - effectiveness.
Understanding the Front Grille Mould
Before delving into the repair process, it's important to understand what a front grille mould is. A front grille mould is a precision - engineered tool used in injection molding processes to produce front grilles for vehicles. These moulds are typically made of high - quality steel or aluminum and are designed to withstand high pressures and temperatures during the injection molding process.

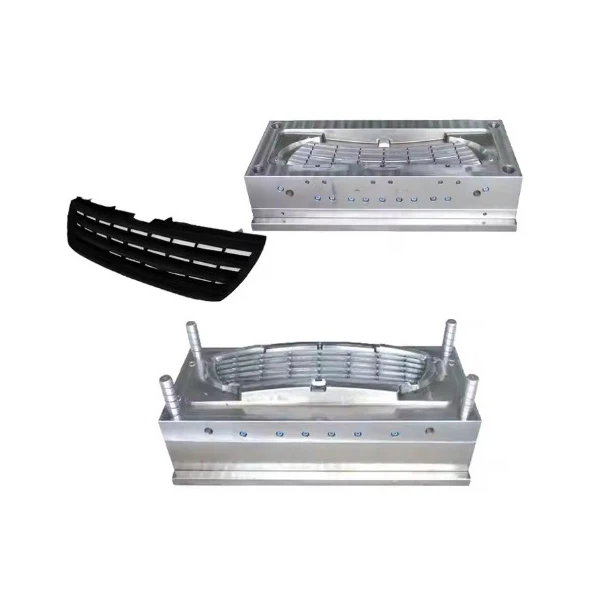
There are different types of front grille moulds, such as Radiator Grille Mould, Automotive Grille Injection Mould, and Automotive Radiator Grille Tooling Mold. Each type has its own unique design and requirements, but the basic repair principles remain similar.
Common Problems with Front Grille Moulds
- Surface Damage: Over time, the surface of the mould can get scratched, dented, or corroded. This can be due to the high - pressure injection of molten plastic, improper handling, or exposure to harsh chemicals. Surface damage can affect the quality of the final product, causing defects such as rough surfaces or uneven finishes on the front grilles.
- Wear and Tear: The constant opening and closing of the mould, as well as the repeated injection of plastic, can cause wear on the moving parts of the mould. This includes the ejector pins, slides, and cores. Wear and tear can lead to misalignment, reduced precision, and ultimately, production issues.
- Cracks: Cracks can occur in the mould due to thermal stress, mechanical stress, or material fatigue. Cracks can be a serious problem as they can propagate and cause the mould to fail completely if not addressed promptly.
- Clogging: The channels and vents in the mould can become clogged with plastic residue, debris, or contaminants. This can affect the flow of molten plastic during the injection process, leading to incomplete filling of the mould cavity and defective parts.
Repair Steps for Front Grille Moulds
Step 1: Inspection
The first step in repairing a front grille mould is a thorough inspection. Use a magnifying glass, a coordinate measuring machine (CMM), or other inspection tools to identify the problems. Check the surface for damage, measure the dimensions of the moving parts, and look for any signs of cracks or clogging. Make a detailed list of all the issues found during the inspection.
Step 2: Cleaning
Before starting any repair work, clean the mould thoroughly. Use a suitable cleaning agent to remove any plastic residue, dirt, or contaminants from the surface of the mould. Pay special attention to the channels, vents, and cavities. You can use brushes, compressed air, or ultrasonic cleaning equipment to ensure a deep - clean.
Step 3: Surface Repair
For minor surface damage such as scratches and small dents, you can use a grinding wheel or a polishing compound to smooth out the surface. For more severe damage, you may need to use welding or metal deposition techniques to rebuild the damaged area. After the repair, polish the surface to restore its original finish.
Step 4: Wear and Tear Repair
If the moving parts of the mould are worn, you may need to replace them. Ejector pins, slides, and cores can be easily replaced if they are damaged beyond repair. Make sure to use high - quality replacement parts that are compatible with the original mould. If the wear is due to misalignment, adjust the parts to ensure proper alignment.
Step 5: Crack Repair
Cracks in the mould need to be repaired carefully. First, clean the crack area to remove any debris. Then, use a suitable welding technique, such as TIG (Tungsten Inert Gas) welding, to fill the crack. After welding, heat - treat the area to relieve any residual stress and improve the mechanical properties of the repaired section.
Step 6: Clogging Removal
To remove clogs from the channels and vents, you can use a combination of mechanical and chemical methods. Use a thin wire or a drill bit to clear any large debris, and then flush the channels with a suitable cleaning agent. Make sure to test the flow of air or liquid through the channels to ensure they are unclogged.
Step 7: Testing
After all the repairs are completed, test the mould. Run a few test shots using a small amount of plastic to check the quality of the parts produced. Inspect the parts for any defects, such as surface finish issues, dimensional inaccuracies, or incomplete filling. If any problems are found, go back and make further adjustments or repairs.
Preventive Maintenance
To reduce the frequency of repairs and extend the lifespan of the front grille mould, it's important to implement a preventive maintenance program. This includes regular cleaning, lubrication of moving parts, and inspection for early signs of wear and damage. Train your staff on proper handling and operation of the mould to minimize the risk of damage.
Conclusion
Repairing a front grille mould requires a combination of technical knowledge, experience, and the right tools. By following the steps outlined above, you can effectively repair common problems with front grille moulds and ensure the continued production of high - quality front grilles.
As a front grille mould supplier, we are committed to providing not only high - quality moulds but also comprehensive support for mould repair and maintenance. If you are facing any issues with your front grille moulds or are interested in purchasing new moulds, we invite you to contact us for a detailed discussion. Our team of experts is ready to assist you in finding the best solutions for your automotive manufacturing needs.
References
- "Injection Molding Handbook" by O. Olsson
- "Mould Design and Manufacturing Technology" by X. Zhang
- Industry standards and guidelines for automotive mould manufacturing and repair.