

Adding sound effects to a baby car made from a mold can enhance the play experience for young children. As a Baby Car Mold supplier, I understand the importance of not only providing high - quality molds but also offering insights into the post - molding customization of baby cars. In this blog, we'll explore the step - by - step process of adding sound effects to a baby car crafted from a mold.

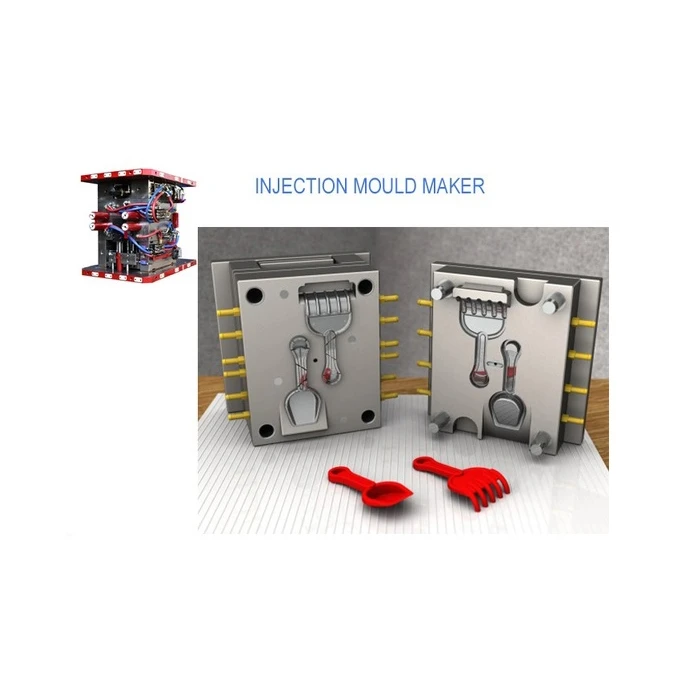
Understanding the Basics of Baby Car Molds
Before we dive into adding sound effects, let's briefly touch on the types of molds we offer. Our Baby Car Mold is designed with precision to create baby cars of various shapes and sizes. These molds are made from high - quality materials that ensure durability and consistent production. We also have Plastic Toy Mould and Plastic Toy Injection Mould options available, which can be used to create different parts of the baby car or other plastic toys.
Selecting the Right Sound Effects
The first step in adding sound effects to a baby car is to decide what kind of sounds you want. For a baby car, common sound effects include engine noises, horn sounds, and even fun melodies. You can find sound effect libraries online or purchase pre - recorded sound chips. When choosing sound effects, consider the age group of the target audience. For very young babies, simple and gentle sounds are more appropriate, while older toddlers may enjoy more complex and interactive sounds.
Choosing the Sound System
There are different types of sound systems you can use to add sound effects to a baby car.
- Sound Chips: These are small, pre - programmed devices that come with a set of sound effects. They are easy to install and are relatively inexpensive. You can find sound chips with different features, such as volume control and multiple sound options.
- Microcontrollers: For more advanced sound setups, you can use microcontrollers like Arduino or Raspberry Pi. These devices allow you to program custom sound sequences and connect different sensors to trigger sounds. However, using microcontrollers requires some technical knowledge in programming and electronics.
Preparing the Baby Car
Before installing the sound system, you need to prepare the baby car made from the mold.
- Inspect the Car: Check the baby car for any defects or rough edges. Sand down any sharp parts to ensure the safety of the child.
- Plan the Installation: Decide where you want to place the sound system components. You need to consider factors such as accessibility for battery replacement, protection from physical damage, and the distribution of sound. For example, if you are using a speaker, you want it to be placed in a location where the sound can be clearly heard.
Installing the Sound System
Installation with Sound Chips
- Wiring: Connect the sound chip to a power source, usually a small battery. Follow the manufacturer's instructions carefully to ensure correct wiring. Most sound chips have simple diagrams that show how to connect the power, speaker, and any buttons for sound activation.
- Mounting: Use adhesive or small screws to mount the sound chip and the speaker in the pre - determined locations inside the baby car. Make sure they are securely attached so that they won't come loose during play.
- Button Installation: If the sound chip comes with a button for activating the sound, install it in a convenient location on the baby car. You can use a small drill to make a hole for the button and then attach it with the appropriate mounting hardware.
Installation with Microcontrollers
- Programming: First, you need to write the code to play the desired sound effects. You can use programming languages like Python for Raspberry Pi or C/C++ for Arduino. There are many online tutorials available that can guide you through the process of programming sound using microcontrollers.
- Hardware Connection: Connect the speaker, power supply, and any sensors to the microcontroller. You may need to use jump wires and breadboards to make the connections. Take your time to ensure that all connections are correct and secure.
- Enclosure: Once the programming and hardware connections are complete, place the microcontroller and its components in a suitable enclosure to protect them from damage. You can use a small plastic box and drill holes for the speaker and any buttons or sensors.
Testing and Fine - Tuning
After installing the sound system, it's important to test it thoroughly.
- Power On: Turn on the power and check if the sound effects play as expected. If there are any issues, such as no sound or distorted sound, check the wiring connections and the programming (if using a microcontroller).
- Volume Adjustment: Adjust the volume of the sound effects to an appropriate level. You don't want the sound to be too loud, as it may be harmful to the baby's ears.
- Function Testing: Test any additional features, such as sound activation buttons or sensor - triggered sounds. Make sure they work correctly and are easy for the child to use.
Safety Considerations
When adding sound effects to a baby car, safety should always be a top priority.
- Battery Safety: Use non - toxic and child - safe batteries. Make sure the battery compartment is securely closed and cannot be easily opened by the child.
- Electrical Safety: Insulate all electrical connections to prevent short - circuits. Avoid using exposed wires that the child could potentially touch.
- Sound Level: As mentioned earlier, keep the sound level at a safe and comfortable level for the baby.
Conclusion
Adding sound effects to a baby car made from a mold can transform it into a more engaging and exciting toy for young children. By following the steps outlined in this blog, you can successfully add sound effects to your baby car. If you are interested in purchasing high - quality molds for your baby car production, feel free to contact us. We are always ready to assist you with your mold needs and provide you with professional advice on the production process.
References
- "The Basics of Sound Electronics for Toys" by Electronics World Magazine
- "DIY Toy Sound Systems" by Make: Magazine
- Online tutorials on microcontroller programming for sound applications