

As a seasoned grille mould supplier, I'm often asked about the installation process of a grille mould. In this blog post, I'll walk you through the entire procedure, from preparation to the final touches. Whether you're a newcomer to the industry or looking to refresh your knowledge, this guide will provide you with valuable insights.
Pre - installation Preparation
Before diving into the installation process, thorough preparation is essential. This phase sets the foundation for a smooth and successful installation.
1. Inspection of the Grille Mould
Upon receiving the grille mould, conduct a comprehensive inspection. Check for any visible damage, such as cracks, scratches, or dents. Ensure that all components are present and in good condition. This step is crucial as any undetected damage could lead to issues during the installation or affect the quality of the final grille products.
2. Machine Compatibility Check
Verify that the grille mould is compatible with your injection - molding machine. Consider factors such as the machine's clamping force, injection volume, and platen size. A mismatch in these parameters can result in improper mould installation and poor - quality output. For example, if the clamping force is too low, the mould may not close properly, leading to flash in the grille products.
3. Cleaning and Lubrication
Clean the grille mould thoroughly to remove any dirt, debris, or rust that may have accumulated during transportation or storage. Use appropriate cleaning agents and tools, such as soft brushes and solvents. After cleaning, apply a thin layer of lubricant to the moving parts of the mould, such as the ejector pins and slides. This will ensure smooth operation and reduce wear and tear.
Installation Steps
1. Mounting the Mould on the Machine
The first step in the installation process is to mount the grille mould on the injection - molding machine. Most machines have a fixed and a moving platen. Place the stationary half of the mould on the fixed platen and the moving half on the moving platen. Align the mould carefully with the machine's tie - bars and use the appropriate mounting bolts to secure it in place. Make sure the bolts are tightened evenly to prevent any misalignment.
2. Connecting the Cooling System
A proper cooling system is vital for the efficient operation of the grille mould. Connect the cooling channels in the mould to the machine's cooling water supply. Use high - quality hoses and fittings to ensure a leak - free connection. The cooling water helps to control the temperature of the mould during the injection process, which is crucial for achieving the desired quality and cycle time of the grille products.
3. Electrical and Hydraulic Connections
If the grille mould has any electrical or hydraulic components, such as heaters, sensors, or actuators, connect them to the corresponding systems on the injection - molding machine. Follow the manufacturer's instructions carefully to ensure correct wiring and connection. For example, incorrect electrical connections can lead to malfunction of the heating elements, which can affect the melting and flow of the plastic material.

4. Alignment and Centering
After all the connections are made, check the alignment and centering of the mould. Use alignment tools, such as feeler gauges and laser alignment devices, to ensure that the two halves of the mould are perfectly aligned. A misaligned mould can cause uneven filling of the cavity, resulting in defective grille products. Adjust the position of the mould as necessary until the alignment is within the specified tolerance.
5. Testing the Mould
Once the mould is installed and aligned, perform a test run. Start the injection - molding machine and set the appropriate process parameters, such as temperature, pressure, and injection speed. Inject a small amount of plastic material into the mould and monitor the filling process. Check for any signs of leakage, improper filling, or other issues. If any problems are detected, stop the machine immediately and make the necessary adjustments.
Post - installation Adjustments
1. Fine - tuning the Process Parameters
After the test run, fine - tune the process parameters based on the results. Adjust the temperature, pressure, and injection speed to optimize the quality of the grille products. For example, if the grille has a rough surface, you may need to increase the injection pressure or adjust the temperature to improve the flow of the plastic material.
2. Ejector System Adjustment
Check the operation of the ejector system. Ensure that the ejector pins can push the grille products out of the mould smoothly without causing any damage. Adjust the ejector stroke and force as needed. A malfunctioning ejector system can lead to products getting stuck in the mould, which can disrupt the production process.
3. Regular Maintenance
Once the grille mould is up and running, establish a regular maintenance schedule. Clean the mould after each production cycle to remove any plastic residues. Inspect the mould for wear and tear and replace any damaged components promptly. Regular maintenance will extend the lifespan of the mould and ensure consistent product quality.
Different Types of Grille Moulds and Their Installation Considerations
There are various types of grille moulds, each with its own unique installation considerations.
1. Radiator Grille Mould
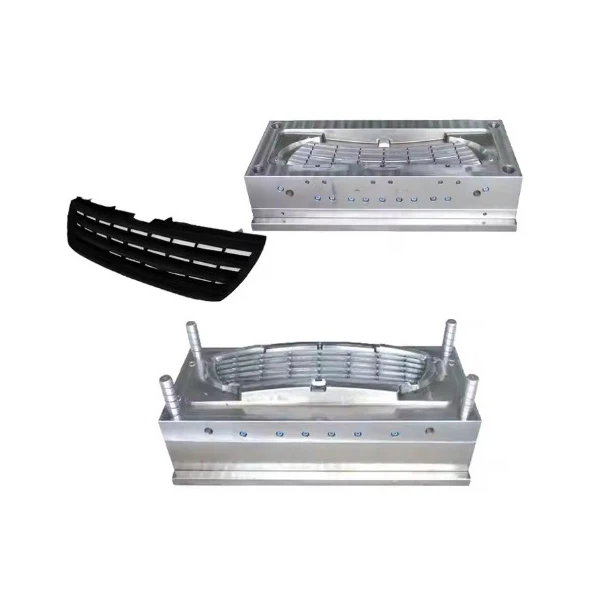
Radiator grille moulds are often used in the automotive industry. These moulds usually have complex designs with fine details. During installation, extra care should be taken to ensure that the mould is properly aligned to reproduce these details accurately. The cooling system is also critical as radiator grilles need to be produced with high precision and consistent quality.
2. Automotive Grille Injection Mould
Automotive grille injection moulds are designed for mass - production of automotive grilles. They may have multiple cavities, which require precise alignment during installation. The clamping force of the injection - molding machine needs to be sufficient to hold the multi - cavity mould securely. Additionally, the cooling system should be evenly distributed to ensure uniform cooling across all cavities.
3. Air Conditioner Grille Mold
Air conditioner grille molds typically have a different set of requirements. They often need to produce grilles with good air - flow characteristics. During installation, the alignment of the mould is important to ensure that the air channels in the grille are formed correctly. The ejector system also needs to be carefully adjusted to avoid damaging the delicate grille structure.
Conclusion
The installation process of a grille mould is a complex but crucial task. By following the steps outlined in this guide, you can ensure a successful installation and achieve high - quality grille products. Remember to conduct thorough preparation, follow the correct installation procedures, and perform regular maintenance. If you have any questions or need further assistance with grille mould installation or procurement, feel free to contact us. We are here to provide you with the best solutions and support for your grille mould needs.
References
- Injection Molding Handbook, Second Edition by O. Olabisi
- Mould Design and Manufacturing Technology by X. Li