

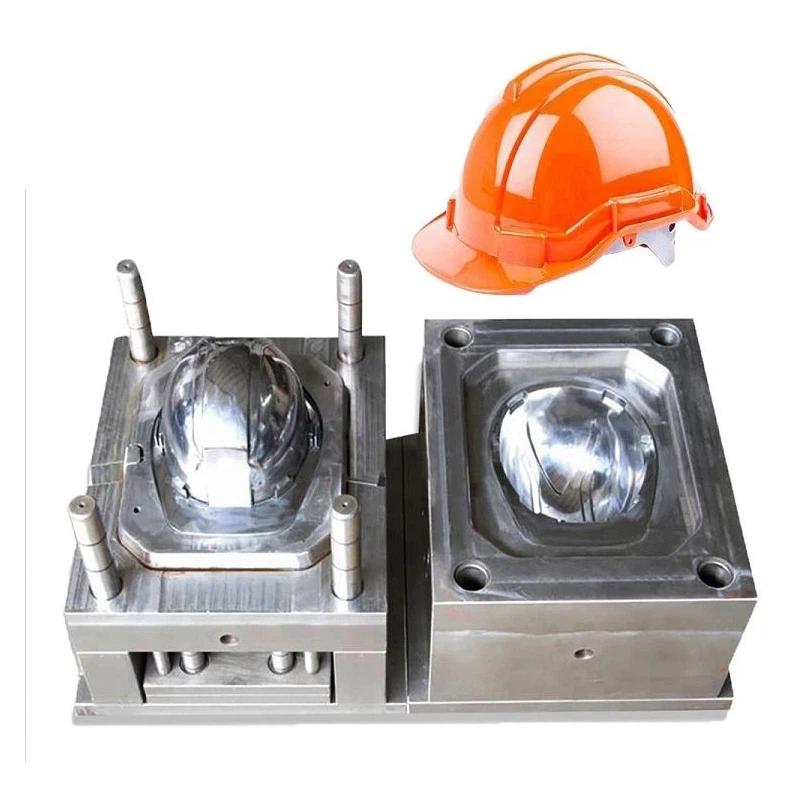
Hey there! As a supplier of helmet moulds, I've dealt with my fair share of issues when it comes to troubleshooting these things. Helmet moulds are crucial in the production of high - quality helmets, whether they're Plastic Safety Helmet Mould or Safety Helmet Mould. And let me tell you, when a problem pops up, it can throw a real wrench in the works. So, I'm here to share some tips on how to troubleshoot a helmet mould.
1. Visual Inspection
The first step in troubleshooting any helmet mould is a good old - fashioned visual inspection. You'd be surprised how many issues can be spotted just by taking a close look. Start by checking the overall condition of the mould. Look for any signs of wear and tear, like scratches, dents, or rust. These can affect the quality of the helmets being produced.
For instance, if there are scratches on the surface of the mould, it can cause rough patches on the helmets. Rust can also lead to discoloration and weak spots. Make sure to check all the moving parts of the mould, such as the ejector pins and slides. If they're not moving smoothly, it can lead to problems with the ejection of the finished helmets.
2. Checking the Cooling System
The cooling system is a vital part of the helmet moulding process. It helps to solidify the plastic quickly and evenly, ensuring that the helmets have the right shape and strength. If the cooling system isn't working properly, you might end up with warped or deformed helmets.
Check the coolant flow. Make sure there are no blockages in the cooling channels. Sometimes, debris can build up over time, restricting the flow of coolant. You can use a pressure gauge to check the coolant pressure. If the pressure is too low, it might indicate a problem with the pump or a leak in the system.
Also, pay attention to the temperature of the coolant. It should be within the recommended range for the type of plastic being used. If the coolant is too hot, it won't cool the plastic effectively, and if it's too cold, it can cause stress in the helmets.
3. Analyzing the Injection Process
The injection process is where the plastic is forced into the mould to create the helmet. There are several things that can go wrong here. First, check the injection pressure. If the pressure is too high, it can cause flash (excess plastic) around the edges of the helmet. On the other hand, if the pressure is too low, the helmet might not be fully formed.
The injection speed is also important. A slow injection speed can lead to uneven filling of the mould, resulting in air pockets or voids in the helmet. A fast injection speed can cause the plastic to splash or create turbulence, which can also affect the quality of the helmet.
Another thing to look at is the plastic material itself. Make sure it's the right type and grade for the helmet being produced. Using the wrong plastic can lead to issues like poor strength, brittleness, or discoloration.
4. Inspecting the Ejection System
The ejection system is responsible for pushing the finished helmets out of the mould. If it's not working correctly, the helmets can get stuck in the mould, causing damage to both the helmet and the mould.
Check the ejector pins. Make sure they're not bent or broken. If an ejector pin is bent, it won't push the helmet out evenly, which can lead to distortion. Also, check the alignment of the ejector plate. If it's not aligned properly, the ejector pins won't work effectively.
Lubrication is also key for the ejection system. Apply a suitable lubricant to the ejector pins and other moving parts to ensure smooth operation.
5. Looking at the Mould Alignment
Proper mould alignment is essential for producing high - quality helmets. If the two halves of the mould aren't aligned correctly, it can cause misalignment in the helmets. This can lead to problems with the fit and functionality of the helmets.
Use alignment pins or dowels to ensure that the two halves of the mould are in the right position. Check for any signs of wear or damage to these alignment components. If they're worn out, they need to be replaced.
6. Dealing with Surface Finish Issues
The surface finish of the helmet is important for both aesthetics and functionality. If the surface of the helmet is rough or has a poor finish, it can affect its appearance and comfort.
If you notice a rough surface finish, it could be due to a dirty mould. Clean the mould thoroughly using a suitable cleaning agent. Make sure to remove any residual plastic or debris from the surface. You can also use a polishing compound to improve the surface finish.
Sometimes, the problem might be with the plastic material. Some plastics require a specific type of surface treatment to achieve a smooth finish. Check the manufacturer's recommendations for the plastic you're using.

7. Monitoring the Cycle Time
The cycle time is the time it takes to complete one full moulding cycle, from injection to ejection. If the cycle time is too long, it can reduce productivity. If it's too short, the helmets might not be fully formed.
Keep track of the cycle time and compare it to the recommended cycle time for the mould and plastic being used. If the cycle time is off, it could be due to issues with the injection process, cooling system, or ejection system. Analyze each step of the process to identify the cause of the problem.
8. Testing the Mould with Samples
Before starting a large - scale production run, it's a good idea to test the mould with a few sample helmets. This allows you to identify any potential issues early on and make the necessary adjustments.
Inspect the sample helmets carefully. Check for any defects, such as cracks, voids, or uneven thickness. Measure the dimensions of the helmets to ensure they meet the specifications. If you find any problems, go back and troubleshoot the mould based on the issues you've identified.
Conclusion
Troubleshooting a helmet mould can be a bit of a challenge, but by following these steps, you can identify and fix most problems. Remember, a well - maintained and properly functioning helmet mould is essential for producing high - quality helmets.
If you're in the market for a Helmet Injection Mold or need help with troubleshooting your existing mould, don't hesitate to reach out. We're here to assist you with all your helmet mould needs. Whether you're a small - scale manufacturer or a large - scale operation, we can provide the right solutions for you. Let's work together to ensure that your helmet production runs smoothly and efficiently.
References
- "Plastics Processing Handbook"
- "Mould Design and Manufacturing Guide"